
Is this the full Breathedge 2 story?
No. Early Access ships the first major story chapter. The game itself jokes that the next chapter is not available yet — treat the soft close as an EA boundary, not a broken ending.

Breathedge 2 walkthrough for EA Chapter 1: main quest flow, when to scavenge side wrecks, and why first-game Chapter 2 guides do not apply. Verified Sep 2026.
Full EA Chapter 1 playthrough (no commentary) — Outskirts hub through mid-chapter comms.
~9 min read
Breathedge 2 is a single-player space survival comedy from RedRuins Softworks (published by HypeTrain Digital), Early Access since August 31, 2026. This Breathedge 2 walkthrough covers the live EA first story chapter only — the Outskirts crash hub, early salvage tools, station power/oxygen repairs, and the mid-chapter antenna / jammer push shown in full no-commentary playthroughs. It is not a Breathedge 1 Chapter 2 guide. Story is unfinished; later regions stay locked. Verified September 3, 2026 · Buy on Steam.
| Fact | Detail |
|---|---|
| Platform | Steam (Windows PC · Early Access) |
| Genre | Action · RPG · Simulation · Survival |
| Mode | Single-player |
| Price | Check Steam for live Early Access price |
| Scope | EA first major story chapter · unfinished |
| Achievements | 39 Steam achievements |
| Reviews | Very Positive (Steam snapshot — changes over time) |
| Survival | Oxygen · temperature (confirmed) |
The opening is mostly scripted: feed Chicken, gear up, ride the convoy bit, then survive the “friendly fire” decoupling that dumps you into the frozen Outskirts. After the crash you are not free-roaming the whole galaxy — you are stuck in one large debris city with a damaged safe pocket, a suspicious companion (Babe), and an AI suit that will keep needling you about survival math.
The tutorial fights show that some hostiles shrug off light fire and that reckless decoupling is how you arrive damaged rather than victorious. Once you wake in the bag, the game flips into sandbox: oxygen ticks, temperature matters, and every tool is gated behind scavenged metal. Pair this page with the beginner guide if you still need the first-hour survival habits.
Babe wants a lock forced. The AI wants power, parts, and fewer dumb risks. Chicken is a story companion, not a pet tree. Law-enforcement bots and Coffinbot pressure show up early as chase / block threats — flee is often smarter than trying to “clear the map.”
The first hard gate is a pry / crowbar-style tool. Babe will not open the lock for you; you scavenge loose metal pieces nearby, open the craft panel, and make the tool before any deeper salvage makes sense. Commentary playthroughs then chase a thumper for aluminum deposits and a cutting tool for sealed panels / wires — exact recipe counts can move in patches, so confirm the numbers in your encyclopedia tab.
| Early craft | Why it unlocks progress | Verify note |
|---|---|---|
| Pry / crowbar tool | Breaks the first lock and many weak containers | Metal piece count — verify in your build |
| Thumper / drill | Breaks aluminum-style deposits for later recipes | Material mix TBA if UI differs |
| Cutting tool | Opens sealed panels, wire bundles, duct-tape patches | Often metal + aluminum — confirm counts |
| Tool mods (gear, etc.) | Small damage / efficiency bumps on the workbench | Optional early; nice once scraps pile up |
Do not circle the whole Outskirts looking for “the story.” The story waits on tools. Open the encyclopedia / craft UI, mark the missing materials, then take a tight orbit around the hub wreckage. The crafting guide lists priority order without inventing unconfirmed full recipe tables.
Bottom-left survival meters (rest, eat, drink, fly / stamina-style drains — labels vary) sit beside oxygen. Eat non-poisoned food first; spoiled biomass can feed later repair machines once you unlock them. Duck inside the safe pocket whenever oxygen dips instead of hoping a random wreck has air.
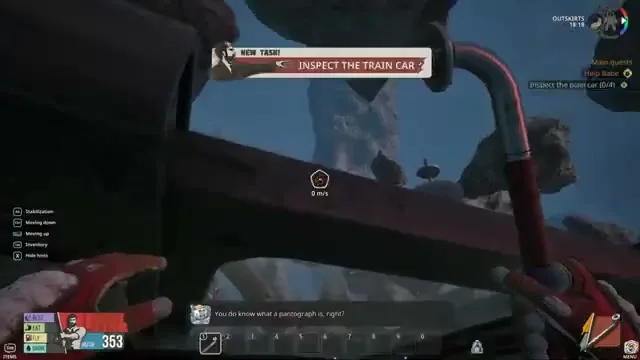
After the pry tool, Chapter 1 funnels you into station recovery: find a battery on a cold exterior module, break ice if needed, install it on the external power module near the orange cabling, then inspect the thawed interior. Parallel to that sits the public oxygen station repair — a multi-part fix that turns a nearby outdoor pocket into a place you can breathe while scavenging.
| Phase | Player job | Payoff |
|---|---|---|
| Battery install | Roof / exterior battery → external module | Lights and thaw; reactor chatter starts |
| Interior inspection | Check damaged fixtures Babe / AI flag | Opens the public oxygen repair checklist |
| Public oxygen repair | Gather parts, fix the outdoor oxygen unit | Ice-in → breathe pocket for longer EVAs |
| Comfort repairs | Kettle / lamp / window / nutrient-style fixtures | Water from ice, better hub uptime — verify each part list |
Once repaired, the outdoor unit accepts ice and creates a breathable bubble — oxygen stops draining while you stand in range. That single upgrade changes route planning: you can stage materials at the bubble instead of sprinting home every two minutes. Details on meter management live on the survival guide.
Repairing the kettle-style appliance can unlock ice → water conversion, which softens food / drink panic. Assembling the broken attendant NPC from scattered body parts is a scavenger hunt that rewards local information dumps — not required to “finish” every main beat, but it densifies the hub. Exact part names: verify in your build.
Matched by build plan, shared topics, and guide progression — not random related links.
Chapter 1 is deliberately messy: main objectives open systems (power, oxygen, antennas), while side wrecks feed materials. The failure mode is ignoring the objective list until oxygen and temperature force a panic retreat with an empty craft queue.
| Signal | Do main | Do side salvage |
|---|---|---|
| Objective mentions repair / install / antenna | Yes | Only for missing mats |
| Craft UI missing one material | No | Tight orbit for that mat |
| Oxygen under comfortable return margin | Return / refill | Abort the wreck |
| Turret or “freeze / don’t move” warnings | Reposition / disable later | Do not greed loot under fire |
Hub signage in playthroughs points at recycling, hotel, business, and monument-style districts. Treat those as orientation labels, not GPS pins. For a cleaner region overview once you leave the immediate crash pocket, use locations and feed scrap into resources.
After the hub is livable, the chapter pivots to communications: repair or confiscate probe / beacon hardware, gather sector frequency data from multiple antennas, deal with movement-triggered turrets that hog power, then chase a military jammer problem that blocks voice traffic. Full no-commentary runs show long stretches of flying between antenna sites, scavenging batteries, and eventually dumping alkaline sludge into a shuttle de-icer loop — phase goals, not step-by-step puzzle spoilers with unverified terminal codes.
| Comms phase | What “done” looks like | Caution |
|---|---|---|
| Local beacon / probe | Beacon runs on a battery; frequency map starts | Missing tuning block — verify in your build |
| More antennas | AI / Babe ask for more data points | Turrets punish greed; cut power feeds carefully |
| Jamming hunt | Voice channel clears enough to reconnect | Do not invent jammer coordinates — follow in-game vectors |
| Depot / shuttle beats | Power doors, face scanners, parasite cleanup | High death risk; refill oxygen first |
| EA soft close | Meta beat about the next chapter not shipping yet | Expect scavenger epilogue, not a 1.0 finale |
Personal ship upgrades and crew duties matter, but Chapter 1 still plays as a salvage walkthrough first. When the hub starts feeling like a home base rather than a crash site, peel off to ship & crew without abandoning oxygen discipline.
Coffinbots and enforcement bots drain oxygen through chase time even when they do not kill you. Bring tools that open loot fast; do not role-play as a deathmatch character. Suit and tool upgrades that shorten EVA time are documented on equipment.
Most soft-locks are craft gates or oxygen routing, not missing secret rooms. Use this table as a mid-run debug list before you assume the quest is broken.
| Symptom | Likely cause | Fix |
|---|---|---|
| Cannot open Babe’s lock | Missing pry tool | Scavenge metal → craft → return |
| Station stays dark / frozen | Battery not installed on external module | Check roof ice + orange-cable module |
| Outdoor oxygen still drains everywhere | Public oxygen unit unrepaired or no ice loaded | Finish repair checklist, drop ice, stand in bubble |
| Cannot open sealed panels | No cutting tool | Farm aluminum + metal, craft cutter |
| Aluminum deposits ignore melee | Need thumper / drill | Craft thumper first |
| Antenna “almost works” | Missing battery / tuning piece | Follow the objective marker — verify in your build |
| Turret melts you on approach | Movement agro + power still feeding it | Reposition, cut power panels, do not stand still in its cone to “test range” |
| Voice still jammed | Mid-chapter jammer chain incomplete | Continue antenna / depot phases; do not paste first-game fixes |
EA will reorder quests and rename props. If a sentence on this page disagrees with your objective list, trust the build. Re-check after patches via early access, and keep achievement hunting for after the chapter flow feels stable — see achievements.
No. Early Access ships the first major story chapter. The game itself jokes that the next chapter is not available yet — treat the soft close as an EA boundary, not a broken ending.
No. Those guides describe the first game. Sequel locations, tools, and quests differ — start here or on the beginner guide.
Main systems (power, oxygen, comms) first. Side wrecks and attendant assembly are optional material / lore routes unless your objective list says otherwise.
The frozen debris-city hub where Chapter 1 drops you after the convoy crash. Exact district labels vary — verify on local signage and the locations page.
Single-player only — there is no co-op walkthrough path.
Use the in-game encyclopedia plus crafting and resources. Exact tables stay TBA until verified per build.
September 3, 2026
Matched by build plan, shared topics, and guide progression — not random related links.